Hi all ,
Here is a little tutorial on making a resin refiner/rosin. I know a lot of you probably know how to do this but I thought I would put my take on it for those who dont.
Ok a little explanation first as far as I see it:
Rosin is a the solid form of resin that you heat up to burn off the liquid terpine that is in it, burning it not only allows you to take the terpine out but gets rid of any debris such as bark and pine needles etc.
Rosin is used for a whole host of different things and for me, knowing how to make it is important. I take a container with me now when I go to any place I know contains pine trees and collect the sap from any natural wounds and cracks in the bark. The sap collected here was found on a stump of a tree that had been cut down and from this one stump alone, I got a fair amount.
Here goes:
1.First you need some sort of container to burn the resin in and something to collect it in. If you are burning small amounts then a beer or pop can is ideal as it has the dimple in the bottom.

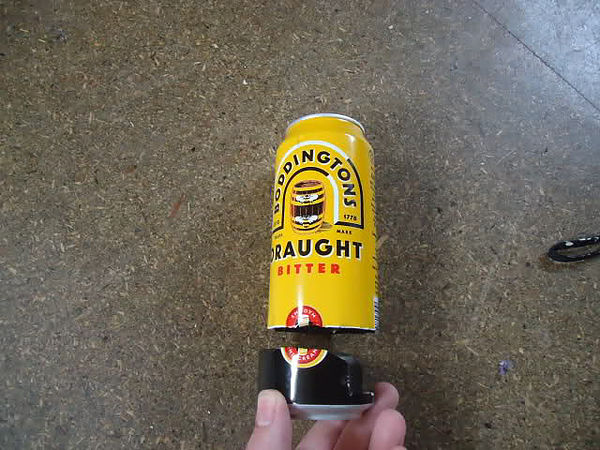
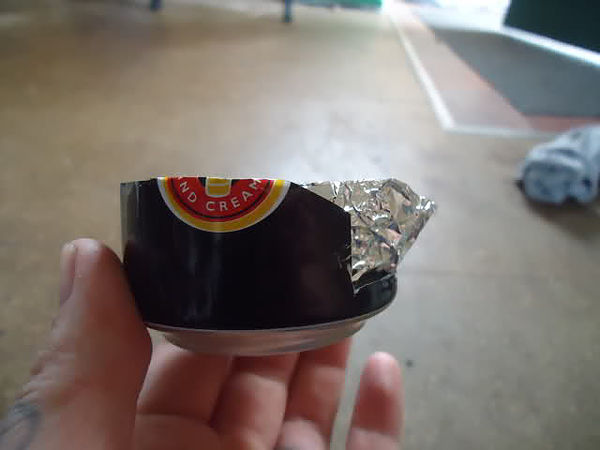
2. Take your can and cut of the bottom I used the black band around the can and it ended up being 1 1/2”.
3. Next cut out a section of the can ( I also snip the corners as it prevents snagging). This will allow you to see how full the container is.
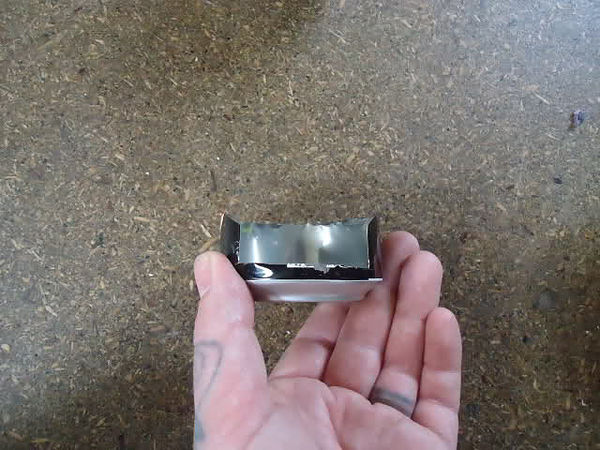
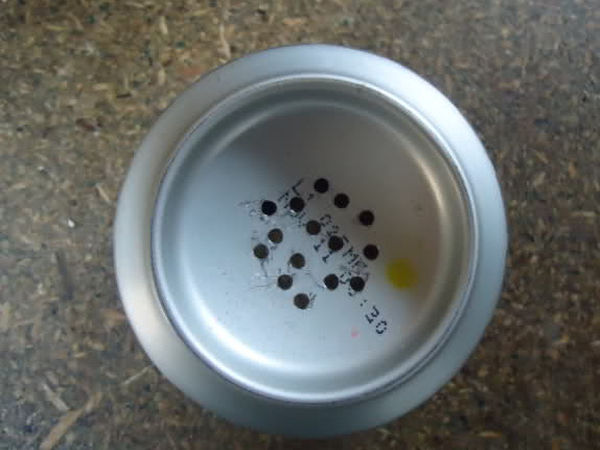
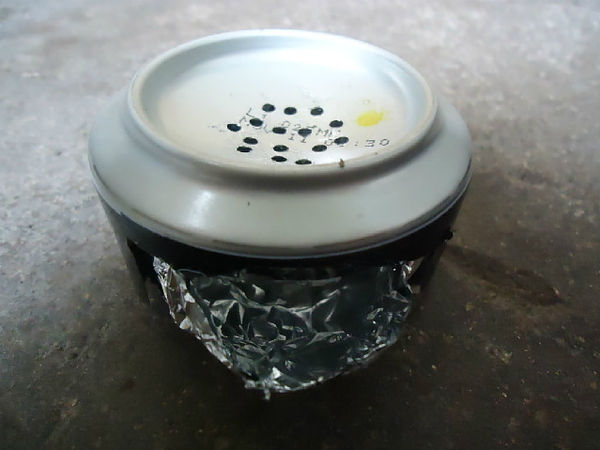
4. Turn the can so the base is upwards and with a nail or a drill make a series of hole close together.
5. Next you need to make a container that will fit inside the can and catch the rosin as it comes through. Here I have made a dish from tin foil as I will be able to easily peel the foil away from the solid block of rosin. You can fashion another can bottom into a dish but you will more than likely have to smash the block to get it out.
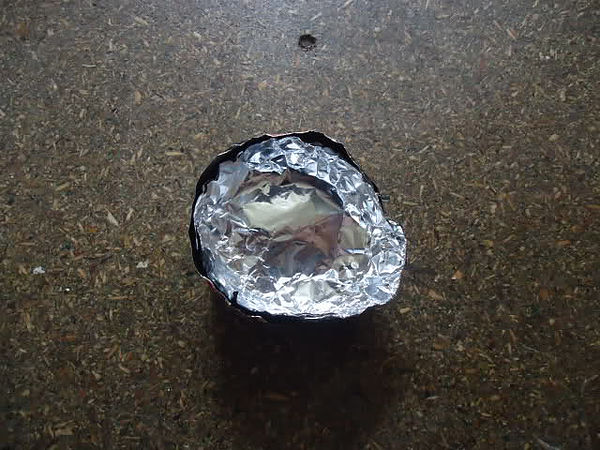
6. Make a Spout end in the foil as this will allow you to see how quickly it is filling.
7. Place your container on the ground and put the can over the top making sure the spout is sticking out of the slot in the can
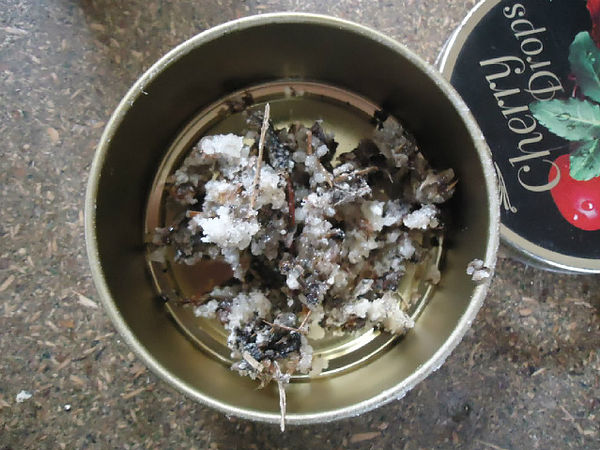
Here is the "Resin" as collected from the trees as you can see it is white and has lots of bits mixed in with it. At this point, it is very sticky and is only partially solid.
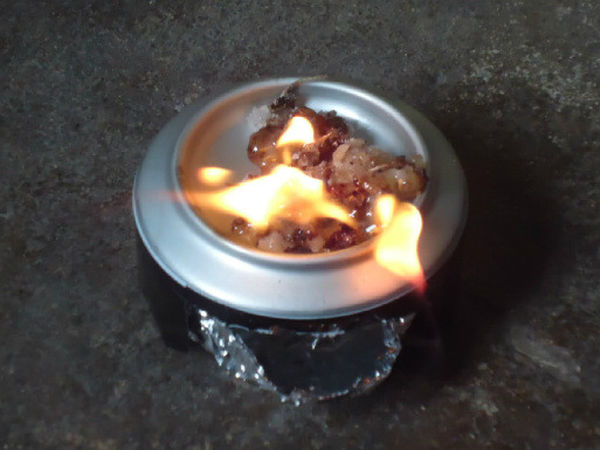
8. Place some of the resin on the can and light it. It should light easily.
(Warning! It may spit a bit for a few seconds so don’t stand to close. Also, you are now burning off the Turpine chemicals in the resin and it produces a black smoke so make sure you are in a well-ventilated area).
9. Wait until it has completely burnt itself out then making sure it is cool enough to handle carefully remove the can. What you now have is the "Rosin" in the container and the impurity’s and burnt debris on the can. At this point, the rosin will still be runny but it cools very quickly.
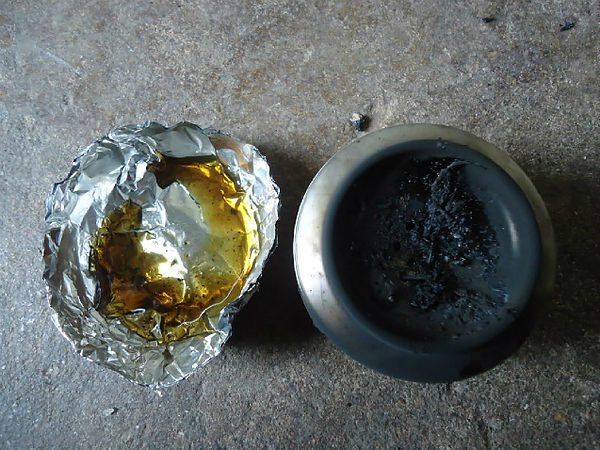
10. Keep burning until you get as much as you want. After each burn get rid of the black waste from the top of the can and make sure the holes are clear. Give the underside of the can a brush off to this will reduce the amount of any burnt bits falling into the rosin.
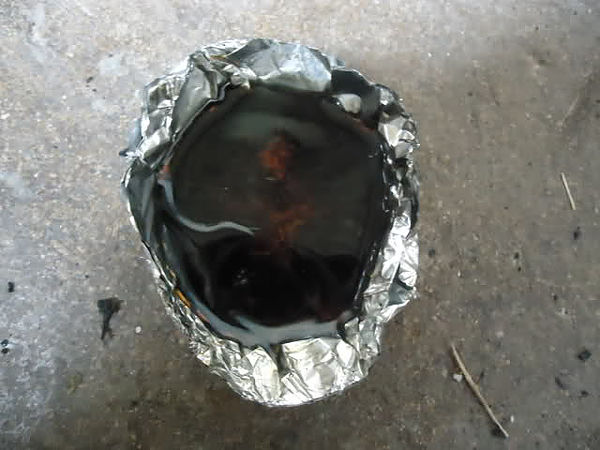
11. When you feel you have enough or the foil is full wait until it cools then peel the foil away. Be very careful as the rosin you now have is very brittle and it doesn’t take much to break it.
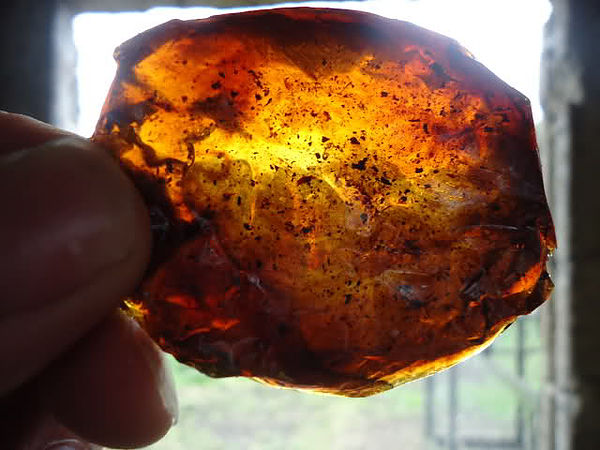
Hold it up to the light and you will see how lovely and clear it is. Yes you probably will have some burnt bits in it but that doesn’t matter. The colour will vary depending on what sap you used, how hot the resin got etc. so you may not find you get the same colour every time and this is nothing to worry about.
You now have rosin and can use it for whatever you need.
I am adding here another quick tutorial on a bigger burner. I found that I had quite a bit of resin to purify and it was taking a while with the can. So if you have the time and/or want to purify larger amounts of resin this may be better suited.
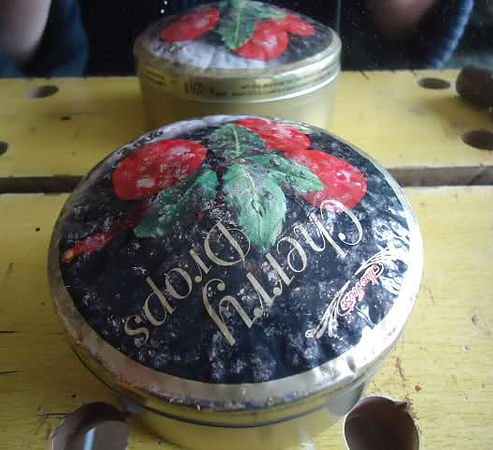
1. Get a tin, here I used a 200g sweet tin
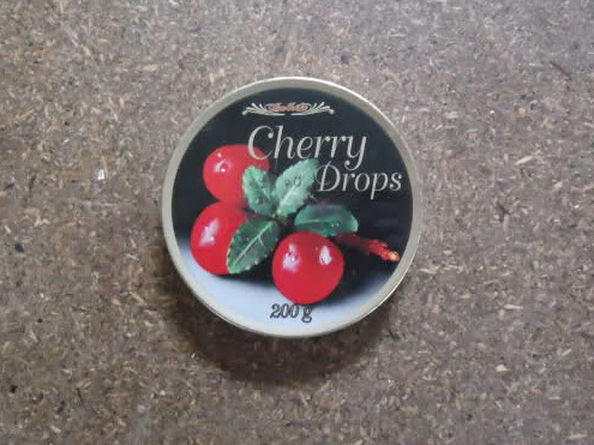
2. Take the lid of and place it on a workbench. What you are after here is the hole in its surface. If you do not have a workbench find anything sturdy with a hole in that will allow you to shape the metal.
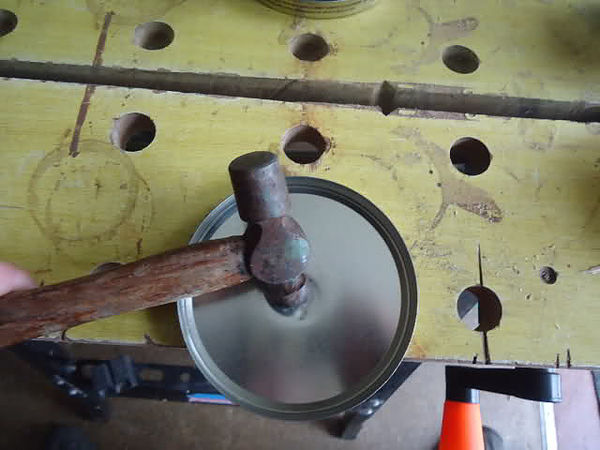
3. Using a ball peen hammer start tapping out the metal that is sitting over the hole. I am no expert on metal working but I found working from the centre outwards in circular motions was the best way to get the shape and to keep it even. Keep going until you have a bowl. You can spend more time on it to get it flatter but this was enough for my purposes. Also, be careful you don’t hit the metal to hard or to much in one place as it will start to split.
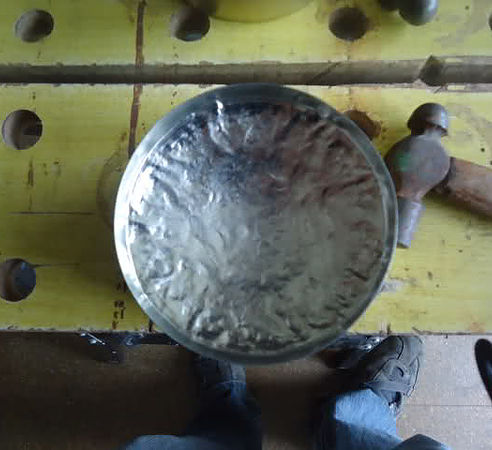
4. Next you need to make the holes using a drill or punched with a nail. Make sure you go from the inside of the lid to the outside.
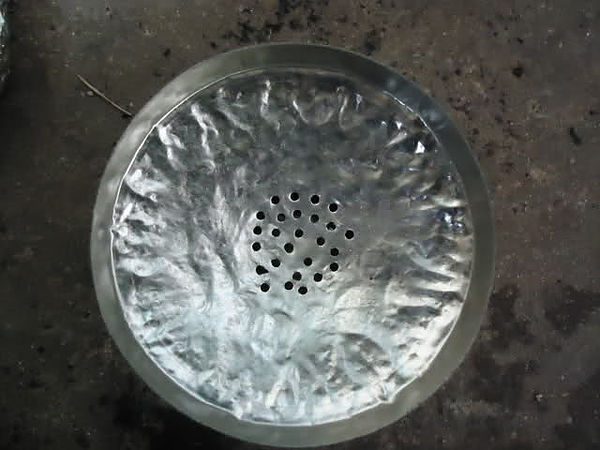
5. Invert the lid and place it over the bottom of your tin. Put your resin on top and light.
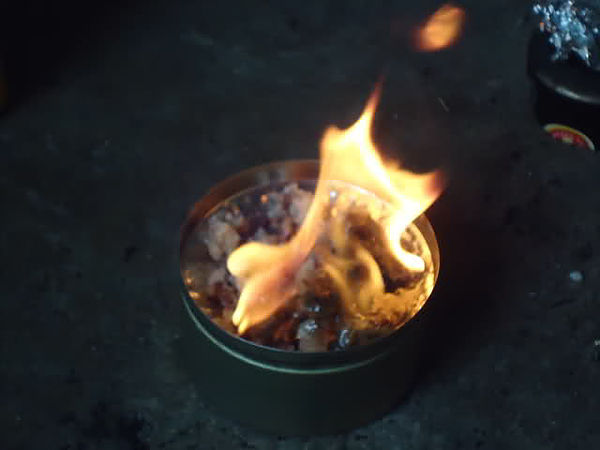
6. Again what you are left with is the waste on the lid and the rosin in the tin. I did find the rosin was a lot clearer using this tin rather than the beer can.
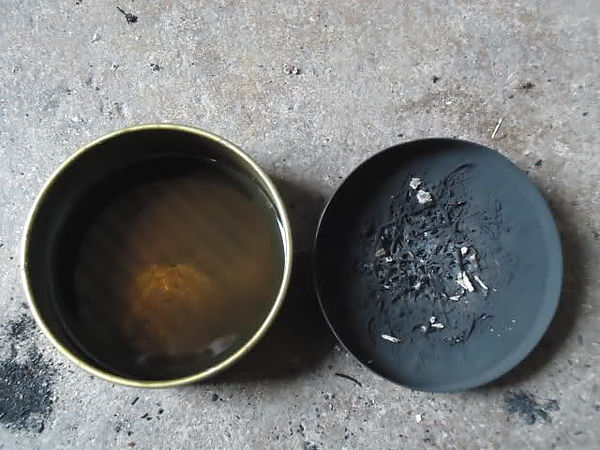
The lid fits perfectly onto the tin still so it is portable.
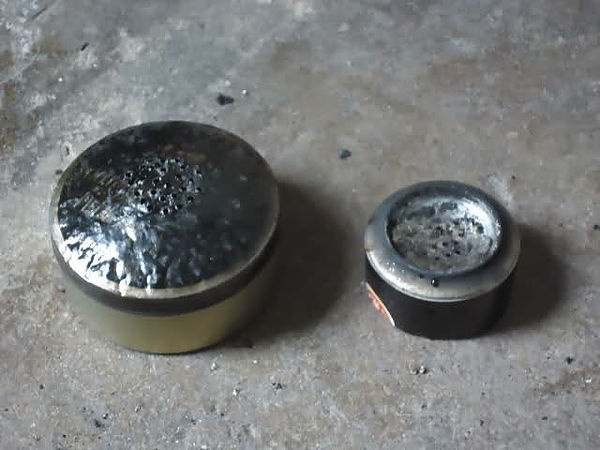
There we have it 2 burners and rosin. Hope that is usefull
All the best
Here is a little tutorial on making a resin refiner/rosin. I know a lot of you probably know how to do this but I thought I would put my take on it for those who dont.
Ok a little explanation first as far as I see it:
Rosin is a the solid form of resin that you heat up to burn off the liquid terpine that is in it, burning it not only allows you to take the terpine out but gets rid of any debris such as bark and pine needles etc.
Rosin is used for a whole host of different things and for me, knowing how to make it is important. I take a container with me now when I go to any place I know contains pine trees and collect the sap from any natural wounds and cracks in the bark. The sap collected here was found on a stump of a tree that had been cut down and from this one stump alone, I got a fair amount.
Here goes:
1.First you need some sort of container to burn the resin in and something to collect it in. If you are burning small amounts then a beer or pop can is ideal as it has the dimple in the bottom.


2. Take your can and cut of the bottom I used the black band around the can and it ended up being 1 1/2”.
3. Next cut out a section of the can ( I also snip the corners as it prevents snagging). This will allow you to see how full the container is.

4. Turn the can so the base is upwards and with a nail or a drill make a series of hole close together.

5. Next you need to make a container that will fit inside the can and catch the rosin as it comes through. Here I have made a dish from tin foil as I will be able to easily peel the foil away from the solid block of rosin. You can fashion another can bottom into a dish but you will more than likely have to smash the block to get it out.

6. Make a Spout end in the foil as this will allow you to see how quickly it is filling.

7. Place your container on the ground and put the can over the top making sure the spout is sticking out of the slot in the can

Here is the "Resin" as collected from the trees as you can see it is white and has lots of bits mixed in with it. At this point, it is very sticky and is only partially solid.

8. Place some of the resin on the can and light it. It should light easily.
(Warning! It may spit a bit for a few seconds so don’t stand to close. Also, you are now burning off the Turpine chemicals in the resin and it produces a black smoke so make sure you are in a well-ventilated area).

9. Wait until it has completely burnt itself out then making sure it is cool enough to handle carefully remove the can. What you now have is the "Rosin" in the container and the impurity’s and burnt debris on the can. At this point, the rosin will still be runny but it cools very quickly.

10. Keep burning until you get as much as you want. After each burn get rid of the black waste from the top of the can and make sure the holes are clear. Give the underside of the can a brush off to this will reduce the amount of any burnt bits falling into the rosin.

11. When you feel you have enough or the foil is full wait until it cools then peel the foil away. Be very careful as the rosin you now have is very brittle and it doesn’t take much to break it.

Hold it up to the light and you will see how lovely and clear it is. Yes you probably will have some burnt bits in it but that doesn’t matter. The colour will vary depending on what sap you used, how hot the resin got etc. so you may not find you get the same colour every time and this is nothing to worry about.
You now have rosin and can use it for whatever you need.
I am adding here another quick tutorial on a bigger burner. I found that I had quite a bit of resin to purify and it was taking a while with the can. So if you have the time and/or want to purify larger amounts of resin this may be better suited.
1. Get a tin, here I used a 200g sweet tin

2. Take the lid of and place it on a workbench. What you are after here is the hole in its surface. If you do not have a workbench find anything sturdy with a hole in that will allow you to shape the metal.

3. Using a ball peen hammer start tapping out the metal that is sitting over the hole. I am no expert on metal working but I found working from the centre outwards in circular motions was the best way to get the shape and to keep it even. Keep going until you have a bowl. You can spend more time on it to get it flatter but this was enough for my purposes. Also, be careful you don’t hit the metal to hard or to much in one place as it will start to split.


4. Next you need to make the holes using a drill or punched with a nail. Make sure you go from the inside of the lid to the outside.

5. Invert the lid and place it over the bottom of your tin. Put your resin on top and light.

6. Again what you are left with is the waste on the lid and the rosin in the tin. I did find the rosin was a lot clearer using this tin rather than the beer can.

The lid fits perfectly onto the tin still so it is portable.

There we have it 2 burners and rosin. Hope that is usefull
All the best


