Countdown to Preparedness, week by week planning and preparing

Homesteading & Country Living Forum

Help Support Homesteading & Country Living Forum:

This site may earn a commission from merchant affiliate links, including eBay, Amazon, and others.
Our local hutterite farm raises pigs which I didn't know about till I noticed someone buyuing a nice looking dressed feeder pig out of the back of a van. Probably can't get one till next fall but then I ran into a small time rancher who has two cows ready to slaughter so I put my name in for 1/2 a beef. Picked up another deep freezer this summer and have a freeze dryer to keep busy.
There are many Hutterite communities in South Dakota. They sell at Farmer's Markets. People get things like green beans, tomatoes, potatoes, etc. by the bushel for canning from them. They also raise, butcher and sell chickens. People buy them frozen and put a bunch in their freezers.

You might ask them what all they have for sale.
 
Last edited:
I buy things in quantity. I am not sure what I would use that much cornstarch for in my whole life, except maybe in gluten free flour. I usually use it as a thickener in gravy, and gravy is not something that I make much of these days.
How do you use cornstarch?
I don't use cornstarch for gravy. Cornstarch with cream is good for making coated crispy fries. (Uses a surprising amount) Good for some pies. Used in some Chinese and other cuisines. I have used more than 40 lbs in my lifetime.

Non cooking uses....
Drying powder mixed with baking soda for shoes, rashes etc
Mixed wet with fine wood chips to make non- toxic wood pucks for smoking food.
Stops squeaks in wood floors (not a good idea in cock roach country)

40 lbs is a decent amount but it stores easily and doesn't go bad. I also have a lot of tapioca and potato starch which are non gmo as well. With the goobermint attacks on farming, the long term availability of many items is in question, plus they want us eating bugs. If I get stuck doing that, I want tempura bugs. NOT.

My whole life, I have bought staples in bulk quantities. A 40 lb bag of anything is my minimum. Those bags are being down sized like everything else. They used to be 50-100 lbs.

From a prepper point of view, stock food that the average Joe doesn't recognize or know what to do with, and/or thinks will kill them per goobermint propaganda, and Bob's your uncle, no one will take it off your hands when push comes to shove,
 
I buy things in quantity. I am not sure what I would use that much cornstarch for in my whole life, except maybe in gluten free flour. I usually use it as a thickener in gravy, and gravy is not something that I make much of these days.
How do you use cornstarch?
I use quite a bit of cornstarch. It is used a lot in Chinese cooking and I use it for baking cakes ( half cornstarch half regular flour is about the same as cake flour but much cheaper and easier to find of course)
Also use it if I make pudding
 
There are many Hutterite communities in South Dakota. They sell at Farmer's Markets. People get thing like green beans, tomatoes, potatoes, etc. by the bushel for canning from them. They also raise, butcher and sell chickens. People by them frozen and put a bunch in their freezers.

You might ask them what all they have for sale.
we do this here, biggest money maker is bread but we do sell meat, chickens fruit and vegetables also and I cheat sometimes and " give away for donations" milk and cheese
there is one other farmer at our market that lives on that only. But this couple sells at all the markets in the area plus they "cheat" and go buy fruit and things from other areas to sell also . There was a big argument at the market when we first started about this but the people selling produce they didn't grow themselves won, but they have to put up a sign stating that
he told us one time he sells about $40000 a year , but not sure what his profit is, and if that's even true....
 
If you need additional income, and who doesn't, think about a part-time job. Seems like in today's market you can't swing a dead cat around without hitting several Help Wanted signs. I worked at least two jobs my entire life. It isn't difficult to find the time to work outside of the home, and the employer will teach you what you will have to know. You don't have to be a rocket scientist to do most of the jobs that are available.
 
If you need additional income, and who doesn't, think about a part-time job. Seems like in today's market you can't swing a dead cat around without hitting several Help Wanted signs. I worked at least two jobs my entire life. It isn't difficult to find the time to work outside of the home, and the employer will teach you what you will have to know. You don't have to be a rocket scientist to do most of the jobs that are available.
There are many ways to earn additional income, even if you are currently working.

Do seasonal work--helping local farmers with planting, plowing, harvesting, working cattle and hogs. Work Christmas markets and fairs with handmade items, food, and ?

Make something to sell--sewing, woodworking, metal work, baking, crafting. There are so many options. I have a friend who retired from truck driving and now makes things out of wood. He has a lathe and makes bowls and candle stick holders. He also makes other kinds of things and he works weekend events. He is always looking for wood from trees that people have cut down. I used to make pine cone wreaths and sell them at Christmas fairs. I made pretty good money doing that.

Write and publish.

Design things such as woodworking plans or sewing patterns and sell them online

Handyman services--small repairs, painting, staining, yard work

House sitting--keeping yard and garden watered and maintained, taking care of animals, being present to prevent break ins, bringing mail and packages in

Dog walking

Selling items on Ebay, Etsy and other platforms. Watch Craigslist, Facebook Marketplace, and other places for items that are free or inexpensive that you know you can sell other places. What can you sell or resell? Used books, tools, furniture with a little sprucing up, electronics that you repaired, vehicles.

People are limited more by their thinking than by their abilities.
Making YouTube videos is another way to make money on the side, like Mick Whipple, son of Dave and Brooke from Alone. He is making videos for a living, in Alaska.

 
We are on Week 8, but I am considering posting all of the weeks, just like I have been with the three posts for each: The idea for the week, the shopping list for the week and the goals for the week, just to get it done and complete.

WEEK 8

Special Prep Considerations—Children
For many of us, our families are the reason for our prepping. We want to do everything we can to make sure they’re safe, no matter what happens in our lives. When it comes to our children, especially young kids, there are a few needs that we should ensure we address.

NUTRITION

Often, as we’re starting out with food storage, we stick to the bare essentials, and we may overlook the real nutritional needs of our children in particular. A good multivitamin can help bridge the nutritional gap when we’re feeding our children strictly from our food storage. Growing bodies also need a lot of protein and calories.

Kids eat a lot of food, all references to childhood obesity aside. My fourteen-year-old has almost zero body fat, yet, at dinner, we might as well just tip the fridge over into his mouth. While we might poke a bit of fun at how much teenagers eat, the reality is that their bodies need all that food to grow. Be sure you have ample food stored for your family.

Also, don’t forget that kids are the pickiest eaters on the planet. Granted, when push comes to shove, they’ll eat whatever you put in front of them if they’re hungry enough. But going through the arguments about how they liked potatoes just fine two days ago and it makes no sense that they now can’t stand them will accomplish nothing other than increasing stress in an already stressful situation. Provide variety in the foods you store and don’t overlook a bit of junk food here and there.

HYGIENE

With the young children in the family, this refers to diapers and wipes, as well as a way to either clean or dispose of them. Even those parents who are die-hard users of cloth diapers might consider investing in a box or two of disposables. In many disasters, it’ll be far easier to dispose of them than it will be to use possibly precious water resources to clean reusable ones.

You know how you can tell a male child has truly hit puberty? The clouds of body spray that fill the bathroom and hallway. Face it, kids can just plain stink. Plan ahead for providing a way to wash up regularly.

If you have girls in the family who are approaching the onset of menses, plan for that as well and stock up on the necessary supplies.

ENTERTAINMENT

Every parent dreads rainy summer days, waiting for the inevitable complaint, “There’s nothing to do!” Now, imagine those days of being cooped up going on and on for a week, two weeks, or even longer. Shudder. Invest in some cheap board games, toys, books, and other distractions and keep them boxed up until they’re really needed. Do what you can to update that box from time to time to keep the contents age appropriate. The eye rolling from a fifteen-year-old being presented with Chutes and Ladders may prove deadly.

EDUCATION

If you’re planning for extreme long-term scenarios, don’t forget to include the education of your children. Invest in homeschooling texts and other resources in the basic subjects like math, science, and history. Stock up on extra notebooks, pens, pencils, and other supplies during back-to-school sales.

Above all, get your kids involved with prepping. Don’t make it a mystery to them. At the appropriate ages and maturity levels, teach them skills like canning, tracking, shooting, first aid, and fire building. If you have active Scout troops in your area, they can be a great way to help your kids learn wilderness skills. Obviously, there will be some things that you want to hold off on until your children are much older before you share with them, such as perhaps the extent of your food storage. It takes awhile before young people truly appreciate the importance of OPSEC (operational security).

Let them help with packing their own Get Home Bags, planning and preparing meals, and building snow caves. Teach them actual skills in addition to basic sentence structure. Show them how to change the oil in the car, then have them do it next time while you supervise. Get them involved with home projects so they learn how to turn a screw and cut a board. Make them understand that the best meals don’t go from a box into the microwave
 
Last edited:
WEEK 8 ASSIGNMENTS TASKS

Make it a point this week to talk about prepping with your children, keeping the discussion age-appropriate. For young children, one outstanding book is Prepper Pete Prepares: An Introduction to Prepping for Kids by Kermit Jones Jr. (Kamel Press, 2013). As you go forward in your prepping, be sure you’re accounting for any special needs of your children, including diet, clothing, and medications.

SAVINGS Add $10 to your Prepper Savings Account.
TOTAL PREPPER SAVINGS ACCOUNT: _____

WATER STORAGE
One gallon (or two 2-liter bottles) per person or a case of bottled water for the household.
TOTAL WATER STORAGE: _____
GROCERY LIST
3 cans vegetables, your choice
2 cans fruit, your choice, but stick with those packed in water or juice, rather than syrup
1 can chili or stew, your choice
1 package or jar of gravy, your choice
1 box powdered milk
1 box (12 packages) of ramen noodles
WEEK COMPLETED Date:____________
 
There are 52 weeks worth, one for each week in a year.
Maybe a month per week (if it’s not too much trouble or as an idea). There is a lot per week! I can’t imagine what the stock is by week 52.
Also, the only thing I use corn starch for that I can think of is deodorant. Once in a blue moon if a recipe calls for it.
 
Maybe a month per week (if it’s not too much trouble or as an idea). There is a lot per week! I can’t imagine what the stock is by week 52.
My thought about this thread is that anyone who comes and asks that question that gets asked frequently, "Where do I start?" can jump in at anytime and start to get organized and stocked up.

And any of us who are interested can jump in whenever and wherever we want to.
 
You don't have to follow the recommendations to the letter of the law, but it is a good reminder of where we should be. I had already done almost everything on the list, but there may be items that have been overlooked. When they focused on children, it really didn't apply to me. JMHO, but I enjoy seeing them every week.
 
You don't have to follow the recommendations to the letter of the law, but it is a good reminder of where we should be. I had already done almost everything on the list, but there may be items that have been overlooked. When they focused on children, it really didn't apply to me. JMHO, but I enjoy seeing them every week.
I totally agree! Many things in life are like this. We can read something and do as we will, using the suggestion to prompt us to do something. My child is grown and been on her own for more than a decade, so not concerned about children, but there are other things that I am more focused on.

It said to buy 1 pound of rice. I don't really ever remember buying one pound of rice, but that item is more like "Go buy a 20 pound bag of rice," at least for me.
 
WEEK 9

Special Prep Considerations—Pets

Whether you view your animals as something akin to employees who are there to do a job, or (like me) you see them truly as members of your family, you need to plan ahead for their needs during and after a disaster. Our pets rely on us to provide them with food, water, and shelter, as well as to take care of any medical needs.

For our discussion here, I’m concentrating mostly on dogs and cats, though the same principles apply to whatever critters you may have. But given that dogs and cats are the most popular family pets, I focus on them.

Our pets have the same needs as we do, so let’s take those one at a time.

WATER
Figure an average of one gallon of water per pet, per day. Obviously toy breeds will require less water than, say, a Siberian husky, so adjust the amount accordingly. The important thing is to have ample water stored for your pets as well as the rest of your family.

FOOD
You should easily be able to calculate how much food your pet will need per day. While you could theoretically feed your pet scraps from your own meals, that’s probably not the wisest plan. First, you might not have scraps to spare. Second, a sudden change in diet may lead to some intestinal issues with your pet.

FIRST AID AND MEDICAL CARE
Basic first aid supplies for pets include gauze wraps, alcohol for disinfection, bandage tape, and antibiotic ointment. If your pet has specific medical needs, such as special medication, talk to your vet about acquiring a small supply to keep on hand for emergency use.

COLLAR AND ID TAGS
Make sure your pet has a collar with appropriate ID and vaccination tags on it. Keep an extra set, with a spare leash, in your pet disaster supply kit. Make copies of ownership paperwork, vaccination records, and medical records and keep this information with your kit.

RECENT PHOTO OF YOU AND YOUR PET
This is very important. Should you and your pet become separated, having a recent picture of the two of you together will help prove ownership. And a photo will help other folks locate your pet if it becomes lost.

PET CARRIER
Should you need to evacuate, transporting your pet in a crate or pet carrier might be beneficial. The crate should be big enough that your pet can stand, turn, and lie down comfortably. Don’t forget a soft blanket as well as a chew toy or two.

SANITATION
For cats, make sure you have an ample supply of litter for their box. For dogs, if you run into a situation where you won’t be able to let them outside for some reason, a stack of old newspapers along with cleaning supplies may be necessary. Keep in mind that many public emergency shelters will not allow you to bring in your pets, so plan ahead. Call around to area motels to see which ones are pet friendly. Also, talk to neighbors, friends, and family to discuss who might be able to help you with your pets should you need to evacuate without them.
 
WEEK 9 ASSIGNMENTS TASKS

Put together a pet emergency supply kit. Make sure to include all the items listed above, as well as any additional needs for your specific situation. When you start formulating your evacuation plans, be darn sure you’ve included your pets in the equation. Find out where you can go with your pets in an emergency. Be sure to keep them up-to-date on any vaccinations, too: even if a shelter allows pets, it may not if the pet isn’t current on all shots.

SAVINGS
Add $10 to your Prepper Savings Account.
TOTAL PREPPER SAVINGS ACCOUNT: _____

WATER STORAGE
One gallon (or two 2-liter bottles) per person or a case of bottled water for the household. TOTAL WATER STORAGE: _____

GROCERY LIST
3 cans vegetables, your choice
2 cans fruit, your choice, but stick with those packed in water or juice, rather than syrup
2 cans meat (tuna, chicken, beef), your choice
2 cans soup, not condensed (they require water)
1 package dry soup mix, your choice
1 box instant potatoes
1 lb white rice
WEEK COMPLETED Date:____________
 
I totally missed last week! I knew it, but was too distracted, but somehow week 10 seems familiar to me, as though I already shared this.

WEEK 10
Calculating Food Storage Needs

Adequate food storage is one of the cornerstones of prepping. While the body can certainly last at least a few weeks without food, the latter part of that time frame will be decidedly less than pleasant. Food is what fuels the body, and in the aftermath of a disaster, you’ll need all the fuel you can get.

Look back to the master food list you made in the first section of this book. How many days could you realistically feed your entire family using only what you have on hand right now? Dr. Bruce Clayton, one of the true “godfathers” of modern survivalism, has said that if you don’t have at least one full year of food stored, you’re wasting your time. Obviously, if you’re just starting out, amassing that much food seems more than a little daunting. So break it up into several easier-to-reach goals. Strive for a week, then two weeks, then a month, then three months. Keep setting the bar higher until you’re satisfied with the amount of food you have stored.

When we talk about food storage, you want a mix of products. You need not, and should not, just go out and buy several pallets of freeze-dried products and call it a day. First of all, doing so will be extremely expensive. Further, proper rotation is a key element of any successful food storage plan. You need to use and restock your stored food regularly. Always use the oldest product first.

While dumping several boxes of freeze-dried food into your pantry isn’t necessarily the worst idea in the world, you need to condition yourself and your family by introducing it into the diet gradually. Failing to do so could have a significantly negative impact on everyone’s digestive systems. A better idea is to work on stocking up on the foods that your family already knows and enjoys such as canned foods like veggies, pasta, stew, chili, and soup; dried goods like beans and rice; and staples such as flour, sugar, salt, and spices.

Concentrate on buying things that are relatively cheap, to get the most bang for your buck. Look not only at the price but the number of servings as well. A can of condensed soup might cost less than a dollar, but you’ll be lucky to get two servings out of it. Not a bad deal if you’re feeding yourself, but if you have a spouse as well as growing kids, you’ll need a bit more than just a can or two for a meal.

Rice is still relatively inexpensive, though the price has gone up in the last year or so. Dried beans are an excellent source of protein and easy to prepare. Beans, rice, and a can of peas, and you can feed your entire family for mere pennies per person.

We’re not talking about gourmet meals here, obviously. Instead, focus on filling bellies with nutrition and calories.

How do you know how much you really need per day? The scientific way is to calculate the necessary caloric intake per person and plan accordingly. This gets a bit complicated, but bear with me.

There are formulas for determining what’s called base metabolic rate. This refers to the number of calories your body needs just to maintain your current weight and activity level. You then adjust that number up or down depending on your desired outcome. Down if you want to lose weight, up if you want to increase weight.

Measure the height (in inches) and weight (in pounds) of each family member. Then, using those numbers, make the following calculations:
Adult Women: 655 + (4.3 × weight in pounds) + (4.7 × height in inches) – (4.7 × age in years)

Adult Men: 66 + (6.3 × weight in pounds) + (12.9 × height in inches) – (6.8 × age in years)

Girl: 655 + (4.35 × weight in pounds) + (4.7 × height in inches) – (4.7 × age in years) 39

Boy: 66 + (6.23 × weight in pounds) + (12.7 × height in inches) – (6.8 × age in year)

You then take each of those figures determined above and adjust them based on each person’s activity level.

Now take your base metabolic rate figure determined above and adjust it based on your activity level. See the chart below for the multiplier you will need for your adjusted calorie intake.

Activity Level Adults Children
SEDENTARY (little to not exercise) × 1.2 × 1.2
LIGHT (exercise up to three times a week) × 1.3 × 1.375
MODERATE (exercise three or more times a week) × 1.4 × 1.55
HEAVY (exercise five or more times a week) × 1.5 × 1.725

The final number for each person tells you how many calories you need to consume to maintain your current body condition. Naturally, consuming a bit less won’t have a hugely detrimental effect on most people, at least not in the short term. But keep in mind that during a long-term disaster recovery period, the odds are good that activity levels will increase among your family members. Whether you’re out cutting up fallen branches, digging and weeding garden beds, or doing laundry by hand, you’ll probably be burning more calories than you currently do.

Should all that math prove entirely too complicated, an easier way to figure out your family’s needs is to devise a meal plan for two full weeks. Don’t worry about what you have in the house right now; this is all just hypothetical. Sit down with paper and pen, and write out what your family might normally eat for breakfast, lunch, and dinner. Then, add in one or two snacks as well, since I’m sure family members are used to having a quick bite between meals. Be as detailed as you can with these meals, estimating quantities of each ingredient that goes into the meal. Don’t just write “tacos” for dinner on Tuesday. Figure out how much meat and other ingredients you normally use.

Creating a meal plan for two full weeks, then doubling each meal, gives you a fairly accurate estimate of what you’ll need for a month to feed everyone. Granted, you may not have access to all the ingredients, such as fresh vegetables, but these figures give you a baseline, a starting point, for your food storage plans.
 
WEEK 10 ASSIGNMENTS TASKS

1. Using the formulas given on page 37, determine the caloric intake needs for each family member. Again, though, you could also create the fourteen-day meal plan instead. Either way, the point is to give yourself some reasonably accurate figures for what you’ll need to store for food for the entire family.

2. Examine your master list for food supplies and estimate how long you could feed your family on what you have on hand right now. Then, determine your first food storage goal. If you’re at two weeks, shoot for a month. If you’re already at a month, then go for two or three months. As we go forward with the lessons, use the items in the purchase category of the assignments as suggestions and substitute both the items and the quantities as needed to meet your food storage goals.

SAVINGS
Add $15 to your Prepper Savings Account.
TOTAL PREPPER SAVINGS ACCOUNT: _____

WATER STORAGE
One gallon (or two 2-liter bottles) per person or a case of bottled water for the household.
TOTAL WATER STORAGE: _____
GROCERY LIST
3 cans vegetables, your choice
2 cans fruit, your choice, but stick with those packed in water or juice, rather than syrup
1 can chili or stew, your choice
1 package or jar of gravy
1 lb dry beans, your choice
WEEK COMPLETED Date:____________
 
Running totals are becoming cumbersome. There is a total at the end of the document.
Running total of water: 9 gallons per person
Running total of cash: $150
 
WEEK 11

Water Filtration and Purification

Back in Section I, we talked about the importance of storing water. Indeed, storing water is one of your ongoing assignments throughout this project. Running just slightly behind this in importance is having the ability to filter and purify additional water supplies. There are, of course, many natural sources of water, such as lakes, rivers, rain, and snow melt. But no matter how absolutely crystal clear that water may be, it should still be filtered and purified.

One of the best investments a prepper can make is to purchase a water-purification system such as a Big Berkey Water Filtration System. Yes, it’s expensive, but it’ll do the job far better than you may be able to accomplish without it. Other brands to look for are Katadyn and Aquamira.

As you compare costs and brands, take a hard look at the specs for each unit. You’re going to want something that will filter sufficient quantities of water to suit your needs. For example, if you have a family of five, you’re probably going to want a system that will do more than a gallon an hour. You also want to consider the size of the organisms the system will filter out. You want a filter that will remove at least down to the 0.2–0.3 micrometer range. That will handle the bad critters like cryptosporidium and giardia.

Unfortunately, such filtration systems don’t work so well on viruses, which tend to be considerably smaller. With that in mind, you may want to incorporate an additional step of chemical treatment or boiling to ensure safe water.

There are also many ways you can purify water without using such devices.

BOILING WATER

You can bring the water to a rolling boil. It used to be that experts recommended letting the water boil for several minutes, but now the latest information says that the water needs to be brought only to a rolling boil. Doing so is enough to kill off any harmful organisms. Naturally, this method requires enough fuel to boil large quantities of water as well as the time to not only boil the water but allow it to cool enough to handle or consume. When at all possible, though, use boiling to disinfect the water—it’s the surest way to provide clean water.

BLEACH
Nonscented chlorine bleach will render questionable water potable. Add sixteen drops (1/8 teaspoon) of bleach to a gallon of water, swish it around, then let it sit for about a half hour. If the water still has a faint chlorine smell, you’re good to go. If it doesn’t, repeat the process. If the water is very cloudy or very cold, double the amount of bleach. Bleach is fairly inexpensive, but it does have a limited shelf life. Once the bottle is open, expect full potency for about six months before it begins to degrade.

You can make your own bleach mixture using calcium hypochlorite, also known as “pool shock.” Here are the instructions for doing so, from the Environmental Protection Agency’s website:

Add and dissolve one heaping teaspoon of high-test granular calcium hypochlorite (approximately ¼ ounce) for each 2 gallons of water, or 5 milliliters (approximately 7 grams) per 7.5 liters of water.

The mixture will produce a stock chlorine solution of approximately 500 milligrams per liter, since the calcium hypochlorite has available chlorine equal to 70 percent of its weight. To disinfect water, add the chlorine solution in the ratio of one part of chlorine solution to each 100 parts of water to be treated. This is roughly equal to adding 1 pint (16 ounces) of stock chlorine to each 12.5 gallons of water or (approximately ½ liter to 50 liters of water) to be disinfected. To remove any objectionable chlorine odor, aerate the disinfected water by pouring it back and forth from one clean container to another. (http://water.epa.gov/drink/emerprep/emergencydisinfection.cfm) This method is appealing because pool shock is very stable and lasts a long time if it’s kept dry and cool. It can also be very inexpensive, especially during clearance sales at the end of summer. Given that you’ll need to use only a very small amount to make your purification mixture, even one or two packages of pool shock will last you a good long time.

WATER-PURIFICATION TABLETS
Naturally, any camping supply store carries a wide range of water-purification tablets. These do work well, but you’ll be able to disinfect only small amounts of water at a time. You’ll go through quite a few tablets in just a few days if this is your primary disinfection method.

WATER BOTTLES
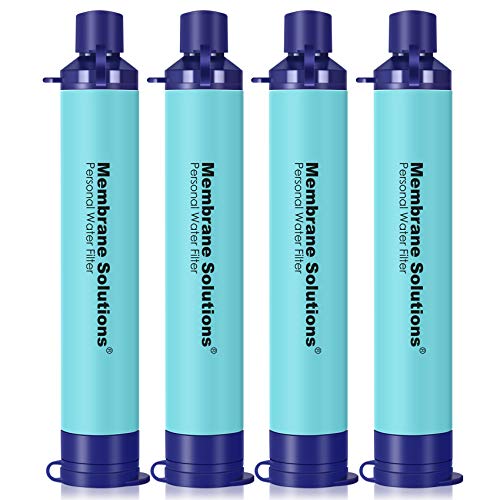
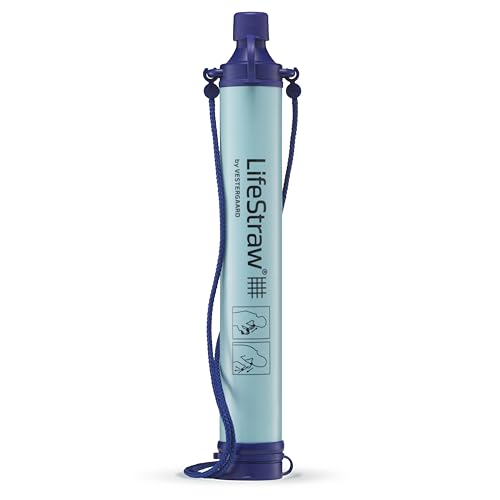
There are also different types of water bottles with the filtration unit built in, such as those sold under the Aquamira brand. Great to have and recommended, but don’t count on using them to provide large quantities of clean water at any one time.

Of course, before disinfecting the water, it should be filtered to remove the larger “stuff” that may be present. One of the best ways to do this is to first let the water sit long enough for anything floating in the water to settle to the bottom of the container. Then, pour the water through one or two coffee filters. I have also seen elaborate DIY setups using successive layers of small gravel, sand, and charcoal before going through coffee filters. If you have the time and the means, this is not a bad approach.

Clean water is absolutely essential to survival. While storing quantities of it is one of the first steps in a preparedness plan, you need to have the means to make found water potable as well. Few of us have the means to store all the water we’ll need during and after a major disaster.
 
WEEK 11 ASSIGNMENTS TASKS

1. If you have the means to purchase a Big Berkey or similar waterfiltration unit, do so. If not, begin setting money aside for one.
2. Begin gathering the supplies necessary for filtering and purifying water. These include coffee filters, pots for boiling, empty bottles, pool shock, bleach, and water-purification tablets. Always strive to have multiple methods available to you for any given task. As they say in the military, “Two is one, one is none.”

SAVINGS
Add $10 to your Prepper Savings Account.
TOTAL PREPPER SAVINGS ACCOUNT: ____ (Suggested total amount to now, $160)

WATER STORAGE
One gallon (or two 2-liter bottles) per person or a case of bottled water for the household.
TOTAL WATER STORAGE: _____ (Suggested total amount to now, 10 gallons per person)

GROCERY LIST
3 cans vegetables, your choice
2 cans fruit, your choice, but stick with those packed in water or juice, rather than syrup
2 cans meat (tuna, chicken, beef), your choice
2 cans soup, not condensed (they require water)
1 canister oatmeal or 1 box of flavored instant oatmeal
1 box granola bars, protein bars, or equivalent
1 sack (5 lbs) flour
1 lb white rice
WEEK COMPLETED Date:____________
 
WEEK 12
Planning Your Garden

Growing your own food is not only a vital component of self-sufficiency but saves you money on the grocery bill. There’s also a distinct sense of satisfaction when you sit down to eat a meal with food that you produced yourself.

It doesn’t matter what your living situation is: apartment, home owner, condo, whatever. There’s always a way to grow something. Maybe the garden can’t be quite as extensive as you’d like, but anything is better than nothing.

This is the time of year to begin planning your garden. If you’ve had gardens in the past, look at your successes and failures to determine what you need to work on this time around. On the other hand, if you’re new to gardening, it’s high time to get going on one.

If you don’t have a large yard available to you, options include container gardening and square foot gardening.

Container gardening is simply growing your plants in pots on your patio, porch, or driveway. Obviously you’re somewhat limited in what you can grow, since it’ll all have to fit in pots. But there’s such a wide range of pot sizes, odds are you can find what you need to grow almost any common garden vegetable. Potatoes can be successfully grown in barrels, for example. You start with a layer of soil and compost. Plant your seed potatoes and cover them with another layer of soil. As the plants sprout, keep all but the green plant covered, adding more and more soil as you go. At the end of the season, just tip over the barrel and harvest your taters.

Square foot gardening is a little more complicated, but still doable for even the newest gardener. There are many books and websites that discuss this method in great detail. It involves building raised garden beds, filling them with prepared soil, and growing your crops in a grid pattern. This is an excellent approach if you have poor soil in your yard or if you have limited space. Square foot gardening allows you to grow more vegetables in a smaller area.

However you approach the problem of space, begin by sketching out your proposed garden, with dimensions of length and width noted. Doing so will give you a good idea of what you have to work with as you plan your crops.

Next, determine what you want to grow this year. Again, if you’ve been through this particular rodeo before, you’ll have a reasonable idea of what works in your area and what doesn’t. If this is your first time around, consider getting in touch with your county extension office. The Master Gardeners there have one mission in life: to help folks like you.

Make a list of the vegetables you and your family enjoy. See what varieties you can grow locally. Don’t forget fruits like strawberries. Consider trying new things, too. For example, I managed to live forty years without ever trying eggplant. There was no real reason for that; I just never got around to it. We decided to try growing eggplant this past season and ended up with a fairly decent crop.

Unless you have unlimited space, you probably won’t be able to grow as many different plants as you want. You’ll have to prioritize. Consider concentrating on those vegetables that either historically grow tremendously well in your area or are appealing to your family.

Once you know what you want to grow, you’ll need seeds. Whenever possible, get heirloom seeds. Heirloom seeds produce veggies and fruit that are “true,” meaning the seeds from them can be planted next year to grow 46 the same thing. Many, many seeds commonly sold in places like Walmart are actually cross-breeds, and the seeds from your harvested crop will be sterile.

There are numerous stores, online and otherwise, that sell seeds. If you ask ten gardeners which places they like best, you’ll probably get ten different answers. Your best bet is to ask people in your area who have gardens every year. You may luck out, and they’ll give you a few seeds to get started. It never hurts to ask, as long as you’re polite about it.

You also need to research the plants you wish to grow. Pay particular attention to plant size, best time to plant, and growing season. You need that information to best plan your garden. Look back at your garden sketch and start marking down where each type of plant will go. Balance out the plant sizes so you don’t end up with big, bushy plants crowding out smaller ones. If you have a plant you can start in April and its growing season is seventy days, odds are you can use that space for a fall crop too.

Make no mistake about it, gardening is rather labor intensive. The planning, though, is where you can have all the fun without getting your hands dirty.
 
WEEK 12 ASSIGNMENTS

TASKS
1. Research and plan your garden for this year. Begin acquiring seeds and organizing them. Store them in the order you’ll be using them.

2. Think about how you might be able to start the seeds indoors. Doing so can help increase your growing season as well as result in for healthier plants. Really, you don’t need much more than a table, plant trays, and a light.

SAVINGS
Add $20 to your Prepper Savings Account.
TOTAL PREPPER SAVINGS ACCOUNT: ______ (Suggested total amount to now, $180)

WATER STORAGE
One gallon (or two 2-liters bottles) per person or a case of bottled water for the household.
TOTAL WATER STORAGE: _____ (Suggested total amount to now, 11 gallons per person)

GROCERY LIST
3 cans vegetables, your choice
2 cans fruit, your choice, but stick with those packed in water or juice, rather than syrup
1 can chili or stew, your choice
1 package or jar of gravy, your choice
1 jar peanut butter (if allergies are an issue, substitute an allergen-free version such as SunButter)
1 jar pasta sauce, your choice
1 sack (4 lbs) sugar
1 lb pasta, your choice

WEEK COMPLETED Date:____________
 
WEEK 13
Basic First Aid Supplies and Training

Depending on the nature and extent of the disaster, immediate medical care may be nothing more than a fond memory. Most homes probably have a half-empty box of adhesive bandages (at best), as well as maybe a mostly empty tube of antibiotic ointment that expired around the time Clinton was dodging scandals. Homes with young children may have a bit more on hand, but likely nowhere near what’s truly prudent.

Jane-Alexandra Krehbiel is a registered nurse and has years of practical experience in the field. Here is her recommended supply list for a well-stocked first aid kit for preppers, taken from her article “Basic Survival First Aid Kit,” which appeared on SurvivalWeekly.com.

BASIC SUPPLIES: WOUND
Sterile 4×4 gauze, one large package for each family member
Sterile 2×2 gauze, one package for each family member
Clean 4×4 gauze, one package for each family member
Clean 2×2 gauze, one package for each family member
A triangular bandage for each family member
Large safety pins
Roller gauze (6–8 in a variety of sizes, used to secure dressings)
Several chemical ice packs
A variety of adhesive bandages
Butterfly bandages
Elastic bandages (both small and large)
Spray bottle of normal saline (marketed as nasal saline) as gentle eye rinse
Three types of wound tape—paper, surgical, plaster (multiple uses)
Sterile cotton swabs (about 200)
Several packages of various protective medical masks
Note: Sterile gauze should be placed in contact with a wound, and the clean gauze can be used as padding over it. Remember that although this may sound like a lot of gauze, one serious wound can consume your supplies in just a few days.

BASIC SUPPLIES:
GENERAL
Neosporin cream, several tubes
Hydrogen peroxide, 2 bottles
Isopropyl alcohol, 2 bottles
Povidone iodine, 2 bottles
Diphendydramine (Benadryl or generic) topical liquid for insect bites
Needle-nose or fine splinter forceps (tweezers)
Hemostats Dollar-store reading glasses as magnifiers if you’re over forty, for removing splinters
Glass thermometers in protective casing, both rectal and oral varieties Paramedic shears or blunt scissors
Vinyl medical gloves (1–2 boxes); avoid latex because of possible allergies
Plain, inexpensive, and deodorant-free sanitary napkins (multiple uses)
Wire splint
Rubber tourniquet

GENERAL MEDICATIONS For each item I mention here, you should have a source of this medication for each family member. What I mean by this is that if you have infants and children, then you must stock
Tylenol (acetaminophen) for each age group: drops for infants, chewables for children, and tablets for adults. The one exception is aspirin, which should not be given to children under eighteen without a physician’s order, because in the presence of a viral syndrome, it’s implicated in causing Reye’s Syndrome.
Acetaminophen (Tylenol)
Aspirin
Imodium A-D
Pepto-Bismol
Diphendydramine (Benadryl)
Iosat for all family members, to be used in the event of a nuclear disaster
Omeprazole
Claritin dissolving tabs (Loratadine)
Ibuprofen (Advil etc.)
Ipecac bottle (to induce vomiting following certain poisonings) Note: Always keep thirty days’ worth of prescription medications you use on an ongoing basis.

SPECIAL NEEDS CONSIDERATIONS DIABETES
Prescription glucagon injection
Ketodiastix
Insulin syringes and your injectable insulin(s)
Source of sugar or juice to treat hypoglycemia
A spare glucometer with extra battery, strips, lancets, and supplies
Insulin pump supplies, and pump batteries and peripherals (if you use a pump)

ALLERGIC EMERGENCIES (ANAPHYLAXIS)
Speak with your physician about the possibility that you or a family member should carry an Epipen.

ASTHMA
Prescription inhaler
Nebulizer (battery operated, in case of power failure)
Medications and normal saline for nebulizer treatments

A well-stocked first aid kit will allow your family to treat many common injuries and illnesses. While there’s no substitute for proper medical care administered by an experienced professional, there are certainly times when that just isn’t feasible. When that happens, you’ll have to make do with what you have. For more information on first aid kits, see http://survivalweekly.com/downloadable-files/basic-survival-first-aid-kit
 
WEEK 13 ASSIGNMENTS

TASKS
1. Beginning this week, start assembling your first aid supplies. Use the list you made back in Section I as a guide to what you have and what you need. Buy what you need as you can and watch the sale fliers from your local stores. Stock up when the price is low.
2. All the supplies in the world won’t do you much good if you don’t know how to properly use them. This week, I want you to look into first aid classes in your area. Check the Red Cross or your local technical schools and community colleges. If a college or tech school seems cost-prohibitive, ask about “auditing” the class. For a reduced fee, you can attend the class, but you don’t receive a letter grade for doing so. Unless you have a compelling reason to get that grade, this is a great, low-cost option.

SAVINGS
Add $10 to your Prepper Savings Account.
TOTAL PREPPER SAVINGS ACCOUNT: _____ (Suggested total amount to now, $190)

WATER STORAGE
One gallon (or two 2-liter bottles) per person or a case of bottled water for the household.
TOTAL WATER STORAGE: ______ (Suggested total amount to now, 12 gallons per person)

GROCERY LIST
3 cans vegetables, your choice
2 cans fruit, your choice, but stick with those packed in water or juice, rather than syrup
2 cans meat (tuna, chicken, beef), your choice
2 cans soup, not condensed (they require water)
1 jar jelly or fruit preserves
1 box (12 packages) ramen noodles
1 bottle multivitamins
1 lb dry beans, your choice

WEEK COMPLETED Date:____________
 
WEEK 14
Communications—Two-Way Radios and Cell Phones

In the aftermath of a disaster, it may become vitally important to communicate with family and loved ones. Obviously, you’ll want to check on them to make sure they’re OK, both right away and throughout the crisis. They’ll want to do the same with you. So it’s a good idea to take the time now to explore some of your options.

The ubiquitous cell phone will likely still work, at least in most situations. Most disasters are local in nature, affecting a relatively small area. But cell phone transmission lines can quickly become overcrowded, making calls difficult to place. In that event, try sending text messages. Quite often, those transmissions will go through, since they use a different system. They’re not ideal for communicating large amounts of information, but they’ll do in a pinch.

Of course, that cell phone requires power to operate. Get into the habit of charging your cell phone daily. I plug in my phone every night at bedtime, letting it charge overnight. This way, if something were to happen, I’m at least starting with a full charge. But even that proactive measure might not be enough, and you could end up staring at a Low Battery message on your phone. Fortunately, several products now provide a quick battery boost to a cell phone. One of the best, in my opinion, is the oddly named WakaWaka Power. You can find it at Survival-Gear.com. It’s a solar-powered unit that not only provides ample juice to charge a cell phone or tablet but also has built-in powerful LED lights. While a bit pricey, around $80 or so, I dearly love mine. If you decide to go with something else, I’d encourage you to explore similar products that are solar-powered, rather than just using batteries.

Another option for person-to-person communication is two-way radios. While similar in size and appearance to the walkie-talkies many of us played with in our youth, the FRS (Family Radio Service) and GMRS (General Mobile Radio Service) units are considerably more powerful. Like any other electrical gadget, they require power, but investing in a small solar-powered battery charger can help with that.

As a practical matter, there isn’t much difference between FRS and GMRS radios. The biggest difference is that the GMRS ones require a license to operate. There are hybrid radios as well that will transmit and receive on both sets of frequencies. If you’re unlicensed, just stick to the FRS frequencies.

What you can do is purchase a few pairs of these radios, giving one radio to each neighbor or family member in the immediate area, and having all agree to use one specific channel to communicate with one another. These radios are not all that expensive and often go on sale at the beginning of summer for camping season as well as in the fall for hunting season.

As you shop around, don’t worry about the ranges claimed on the packages. It might say the effective range is several miles, but that’s true only if there’s nothing larger than a blade of grass between you and the receiver. All these radios operate on “line of sight” and are, as a result, affected by trees, buildings, hills, and other obstructions. I would highly recommend experimenting in your area to determine exactly how far the radio signals will reach, and plan accordingly.

Something else to consider about these two-way radios is that they are by no means private. Anyone within range could turn on their own radio, tune to your channel, and hear everything being said. So I wouldn’t rely 52 on these units for any sort of private communication. Checking on Aunt Sally is one thing, but telling your right flank unit to sneak up on the enemy is quite another.
 
WEEK 14 ASSIGNMENTS

TASKS
1. Begin shopping around for two-way radios. The goal is to have at least one radio for each family member, as well as one for each neighboring family. Play around with them to determine the actual range in your location.

2. If you don’t already have a cell phone, consider investing in a “pay as you go” model. You don’t get locked into an unneeded or unwanted multiyear contract, but you still have the ability to use the phone during an emergency.

SAVINGS
Add $10 to your Prepper Savings Account.
TOTAL PREPPER SAVINGS ACCOUNT: _____ (Suggested total amount to now, $200)

WATER STORAGE
One gallon (or two 2-liter bottles) per person or a case of bottled water for the household. TOTAL WATER STORAGE: ______ (Suggested total amount to now, 12 gallons per person)

GROCERY LIST
3 cans vegetables, your choice
2 cans fruit, your choice, but stick with those packed in water or juice, rather than syrup
1 can chili or stew, your choice
1 package or jar of gravy
1 box of baking mix, preferably the type that doesn’t require eggs, milk, or other ingredients
1 package dry soup
1 lb white rice

WEEK COMPLETED Date:____________
 
This is a topic that I've been working on: porta potty, privacy tent, bags to line, moisture absorbing gel. I want to get a bag or bin to store it all in. I will add t.p. and wipes for hands. Saw dust or cat littler can be used for absorption.

WEEK 15
Human Waste Disposal

Where are you going to go when you have to, well, go? It isn’t always as simple as finding a tree at the back of your yard. Proper disposal of human waste is essential in preventing illness. While toilets may still work even if the water pressure doesn’t (you can fill the tank by hand), if the disaster goes on long enough, pump stations will get backed up and septic tanks will get full, causing overflows in homes. No, that won’t be nearly as much fun as it sounds.

One option is to line the toilet with a garbage bag, replacing the bag as it gets full. The same principle applies when using a five-gallon bucket. In fact, many camping supply stores now sell specially made toilet seats that will fit on those buckets. If the bucket is the option you’re choosing, you could even dispense with the garbage bag liner and just use kitty litter or sand in the bucket to soak up the liquids.

In either case, you can help make the smell manageable by sprinkling the waste with powdered detergent or baking soda.

Of course, there are many different kinds of chemical toilets available, and you’re welcome to purchase one or two of them. But the options listed above are considerably cheaper, which would free up funds to purchase other supplies.

Keep in mind that any container filled with human waste is going to be heavier than you might otherwise anticipate. Don’t let the containers get so full you can’t easily move them.

When it comes to disposing of the waste, there are basically two options—burning or burying—each with advantages and drawbacks.

If you bury the waste, it is out of sight (and smell). But that involves a considerable amount of work digging the holes and filling them in again. You’ll need to do this as far as possible from any water source to prevent contamination. Figure at least a couple of hundred feet, more if feasible.

Burning the waste will involve less personal energy expenditure, since you won’t be digging any holes. But you’ll end up using lighter fluid or another flammable liquid to get the fire going, which is fuel you could use for other purposes.

Now, with all that said, there’s also the possibility of building an old-fashioned outhouse or latrine pit. While this is not the worst idea in the world, heading out into minus-twenty-degree wind chills to squat over a pit is no one’s idea of a good time. If you decide to go this route, you’ll want to situate the latrine at least two hundred feet from any water source. Dig a trench about six feet long, two feet wide, and a couple feet deep. Keep the removed soil piled up nearby. To use, squat over the trench and do your business, then shovel some of the loose soil over the waste. If the crisis runs long enough that you end up filling the entire trench to about a foot from the top, dig another one.

While there are many alternatives to toilet paper, most of them are considerably less than ideal. Be sure to stock up on this vital supply, because you can never really have too much on hand. If you do run out of this essential and valuable resource, one of the best available options will be to cut old cotton T-shirts into squares. Fill a small bucket (preferably one with a lid) with a strong solution of bleach and water and keep that nearby. As the fabric wipes are used, toss them into the bucket. As you run low, you’ll wash and then reuse the wipes.

Be sure to also have a way to wash after using the facilities. One of my friends in the military has described how “ass and hand disease” laid out most of his buddies at some point during their tour of duty in 54 the Middle East. It’s a very real concern, as the lack of being able to wash hands is one of the main causes for disease in third-world countries. Hit your local dollar store and stock up on hand sanitizer.
 

Latest posts

Back
Top